Simple Doodles step-by-step

With all the Coronavirus scare going around and the worldwide lockdown, I think everyone needs some art in their life for some sanity! Made some quick and easy step-by-step pictures to doodle while you are at home wondering what to do next!!

Have fun drawing and coloring !!

20200319_09571420200319_11004420200319_11395420200319_11522820200319_13414020200319_14080520200319_16222720200319_095356

How to draw a simple Lighthouse For Kids

Past few days have been so cloudy in San Diego! We miss the Sun and the blue Sky…we miss Sun Diego! On top of that the school and office closure because of the current COVID-19 situation is not making it any easier! To make us feel better, the kids and I have been working on Seascapes…with Bright blue Sky and Clear teal Ocean waters!

And that’s when my little one wanted to draw a LIGHTHOUSE! So I Broke it down into simple Shapes for her and we came up with a beautiful Lighthouse! Sharing with you all the step-by-step method to draw a Landscape for the absolute beginners!!:)

20200316_185938


20200316_185826


The YouTube channel : Art for fun!

In this post  I am sharing the YouTube video link for the girl with balloons as per the suggestion of family and friends, hope this makes it much easier to understand!

Click on the link below to check out the video and don’t forget to SUBSCRIBE to Art for Kids!

Girl with balloons

Palette Knife Painting with acrylic colors

For the past few weeks I have been teaching my 9 year old how to create texture on an acrylic painting with palette knife and she is loving the effect it is having on her paintings.

For those of you who are hearing the word palette knife for the first time…Palette knife is a knife used for mixing colors. So if your child knows how to put butter on a toast:), I’m pretty sure they will be able to work with palette knives. If you’re still scared of handing them to your child I know that art stores also sell the plastic variety!

Advantage of using Palette knives:

  1. Create texture on a painting without having to add much details
  2. Since you’ll be layering your paints( similar to oil painting), its much easier to wipe it out and start again. It takes more time to dry so its easier to make changes to your painting!

Things needed:

  1. A canvas- mine was 8X10
  2. A palette knife -the one that looks similar to a butter knife is good
  3. Some sponge brushes
  4. A thin detailing brush
  5. Acrylic Colors- I have used deep yellow, red, orange, leaf green, light blue, purple blue, black and white
  6. Some paper towels

Once you have all the stuff you need follow the link below to make your painting!

How to paint fall trees on a lake

Painting a girl with umbrella/balloons


In this activity I will show you step by step on how to make a girl holding an umbrella or some balloons, with some acrylic paint and sponge brushes and some cotton swabs. It is pretty quick and makes a great painting for a kids room or it looks great on greeting card!!

Things we need:

  1. 8×10 canvas or a cardstock paper folded into half
  2. Couple of sponge brushes
  3. Cotton swabs or you could use a normal painting brush
  4. Acrylic paint


Lets get painting!

  • First step, use the round edged sponge dip it in your desired hair color and press it on the center of your paper.
  • Use the cotton swab, get a little color for painting the neck and just swab it as shown in the pictures below.
  •  Next step, we use the flat edged sponge brush to make the top of her dress as shown in the picture below.
  •  Next we are going to make her rainbow skirt. Get your rainbow colors and squeeze out some paint on your canvas/paper. Then drag it down in the shape of a skirt as shown in the picture below.
  • Next we will use the cotton swab to add her arms and to add a handle of the umbrella on her right hand. Check out the picture below.
  • Next use your flat brush, get some paint and drag it down in the shape of an umbrella as shown below.
  • Next use the cotton swab or regular paint brush to add in some details on the umbrella as shown below.
  • Next use the cotton swab to add in some braids to her hair.
  • 20190826_104929
  • And looks like we are done!!
  • 20190826_105025
  • You can similarly make a girl with some balloons!!

To check out the YouTube Video link for girl with balloons click on the link below:

Girl with balloons

Flowers with sponge brushes

Collage flowers (2)

I recently got a set of sponge brushes from Michael’s for doing summer activities with my toddler and quickly discovered that this is the best way to teach little children paint with liquid colors! I realized that its much easier for them to handle sponge brushes compared to the regular brushes.

In this activity I will share how we painted  a bunch of flowers with sponge brushes and Crayola washable paint ( you may use Acrylic or Tempera paint too).

Things needed:

  1. 8×10 canvas panel
  2. Paint set 3-4 colors
  3. sponge brushes round and flat edged.

Dip your round brush in a dark colored paint and make some dots (center of the flowers) randomly on your canvas. This is to give you an idea as to where your flowers should be.

20190822_164650

Next we got the yellow color on the flat edged sponged and create your petals one by one, start from the edge of the circle and flick it outwards. Go around the center of the flower.

Repeat and use as many colors as you like to make your picture colorful.


Coming Up:

In the next post I will be sharing how to draw a girl holding an umbrella…with just sponge brushes and paint!!


Easy popup card for kids

When I was a kid, I remember making handmade cards for everyone during the holidays and posting them to all the friends and family.

But in today’s age of technology, all these have been replaced by a mere forward of message on Social medias. But I do try to encourage my daughters to at least make a card for Birthdays and they enjoy it very much.

In this post I would love to share how to make an easy , that are fun to make and they don’t even consume a lot of time.

List of things required for the project

  1. Construction paper( plain white or colored) preferably 2 different colors and/or card stock paper
  2. Scissors
  3. Ruler
  4. glue stick
  5. Pencil and eraser
  6. Markers to write your message

Steps 1-4:

  1. Get a construction paper and fold it in half.

    image1
    Step 1
  2. Draw a rainbow and two clouds as shown in the image below.
    image2
    Step 2
  3.  Cut out the rainbow and clouds and attach the clouds to the bottom of the rainbow.

    image4
    Step 3
  4. n the next step we have to cut out two tabs on the purple paper so that we can attach the rainbow in the position shown on step 3. Make the cuts along the lines drawn in the image.                                                                                                             image5      image6
  5. Now put some glue on the vertical side of the tabs and attach your rainbow.image7
  6.     In the next step we will make a 3rd tab with a piece of paper as shown in the image below and glue it to the top center of the rainbow so that it can stand straight when you open your pop up.                                                                                 image8 image9
  7.  Next step is to get your cardstock paper and make the measurements to get the purple popup paper fitted inside it.                                                                                   image 10image12
  8.  After you cut out the purple popup to fit inside your card stock paper, glue it inside.
  9. Write your message on the white paper, now when you open the card the rainbow will pop up.
  10.   image13    image14


Using basic shapes and draw a landscape

This activity is appropriate for kids 5 years or more. Here we use basic shapes like a triangle, square, rectangles and circle to draw something meaningful. It is best to start with this since most kids relate easily to these shapes by 4 years and have tried to draw these by themselves.

It helps them keep interested to start with something that they already know and can probably draw. At the end of the session I will try to fit all of these pictures into a single drawing and there…they have their first landscape or as my daughter calls it… big people painting.

Remember…do not worry about the shapes being perfect. It is being done by a child.

  1. The most basic thing that every kid might have tried: A house.
  2. A car.It is easier to draw the car without getting worried about the curves. Remember it is a drawing for a 4-year-old.
  3. A flower in a pot, an apple tree.
  4. A sun and mountain or a rainbow.

Once they have learnt to draw these…ask them to put it in a picture all together. Let them doodle and explore the world of art.

And again, the shapes need not be perfect, the shapes in nature aren’t!Remember to encourage them, if you try too hard to make the perfect picture. They are still in the process of learning!

Discuss their work, ask questions, show interest; it might not look like a lot but it was your kid’s hard work.

Here is a picture of what my daughter drew and colored based on these simple shapes when she was younger.

first drawing

She could not complete the coloring at one go and its perfectly normal.

She made some little tweaks of her own. She told me that it was sunset ( so the sun started hiding behind the mountains)and the car is parked since Papa came home from office. That’s the kids…OBSERVING.

The picture kind of reminds me of Peppa pig’s house and their car. She told me that it is going to be an orange tree and here’s the Peppa pig’s house she actually drew for her sister 2 years later!!

peppa (2).jpg


Pistachio shell landscape

This week we have been working on a little wall art using leftover pistachio shells.

Since school started, we have been working on mini projects that can be finished in less than an hour.

Things Required:

  • A small canvas
  • Acrylic colors and paint brushes
  • Marker pens
  • Pistachio shells
  • Craft glue / hot glue

I have explained step by step procedure to make the art below:

  1. Decide on an art work that you would like to create. We have chosen a easy garden with flowers, butterflies, ladybugs and rocks.
  2. Get your canvas and paint the background.
  3. Color your pistachio shells based on the picture you want.
  4. Place your colored shells on the canvas to get an idea of where to stick the shells.
  5. Use a craft glue to stick them firmly in place.
  6. Use your markers and put in the finishing touches( like the stems and the grass in the background).

And that’s it; there’s an easy artwork that the kids can finish in no time.

Some other ideas that you could use:

  • A girl on a swing
  • Birds on a tree
  • An underwater sea adventure

Try out any of these and share with your friends too!!

Getting ready for Halloween!!

Even though we have more than a month left… but we already started planning for fall decor.

During the Labor Day weekend it was so hot in SAN Diego, we hardly went out, so us mother-daughter duo spent some time coming up with some ideas for decorating on Halloween.

Sharing a very easy Halloween canvas made with paper lunch bags below.

Things required:

  1. Three brown paper lunch sacks
  2. Black/brown markers
  3. Glue stick and clear tape
  4. Led lamps or torch ( preferring yellow lights)

Step1.

Align the brown paper bags properly and choose a little Halloween themed drawing.

Step 2.

Use a brown/black marker to color.

Step 3.

Join the 3 bags on the side with a glue stick, you can use a clear tape to join them from the top.

Step 4.

Place a LED light inside each of the lunch sacks to light it up.

Note: The bigger the lamps, the better the canvas would look, I had only one big one which I placed in the center.

Also check out the fall themed painting with step by step instructions:

It’s a Fall feeling!!

It’s a Fall feeling!

Can’t believe summer is almost over!! Time for getting back to school…time to get your learning hats on!! Nimisha has been so excited to get back to school.. not only cause she has been missing her friends but also ’cause it’s gonna be time to enjoy some Fall fun..going to the pumpkin patch, picking out some pumpkins to carve, going on a hay ride and most of all…Halloween!!

So this week we are working on a Fall themed painting that we would love to share with you!!

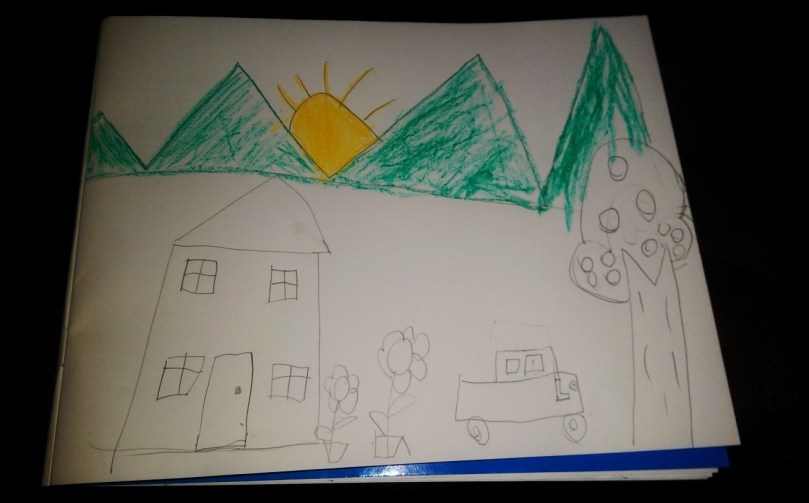
Below is the blueprint of the painting (medium:color pencils on drawing paper).

The above painting has the following parts that I will illustrate step by step:

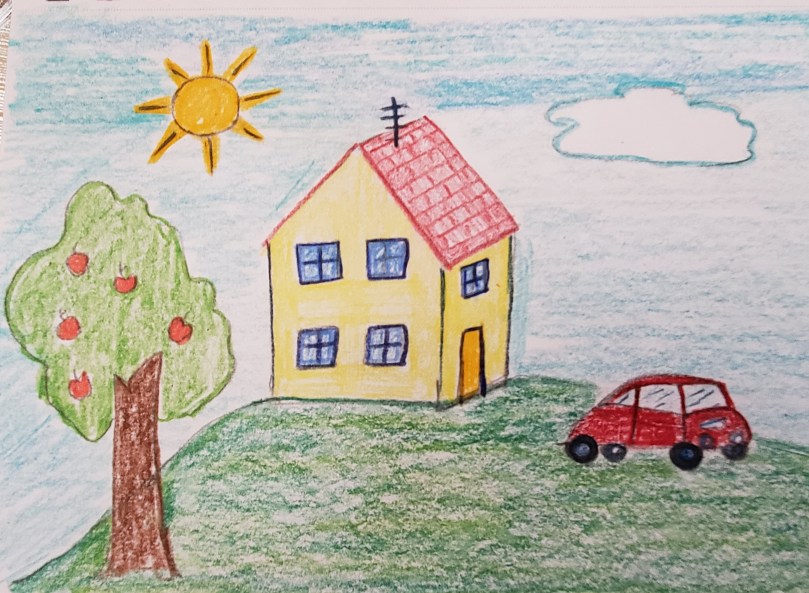
1. The tree with branches( highlights are the fall colors yellow, orange and red)

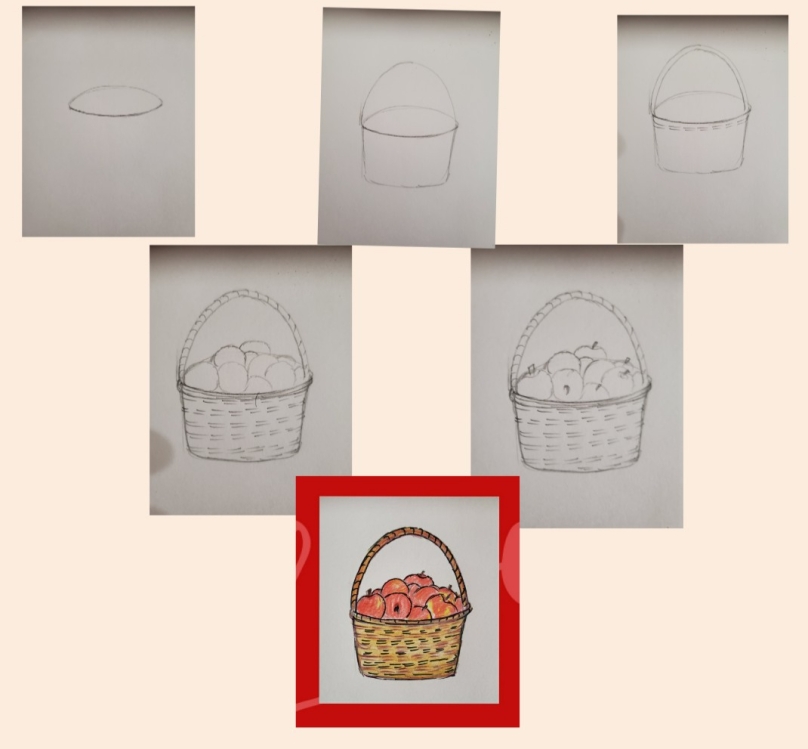
2. The pumpkin patch-the pumpkins are positioned in different ways).

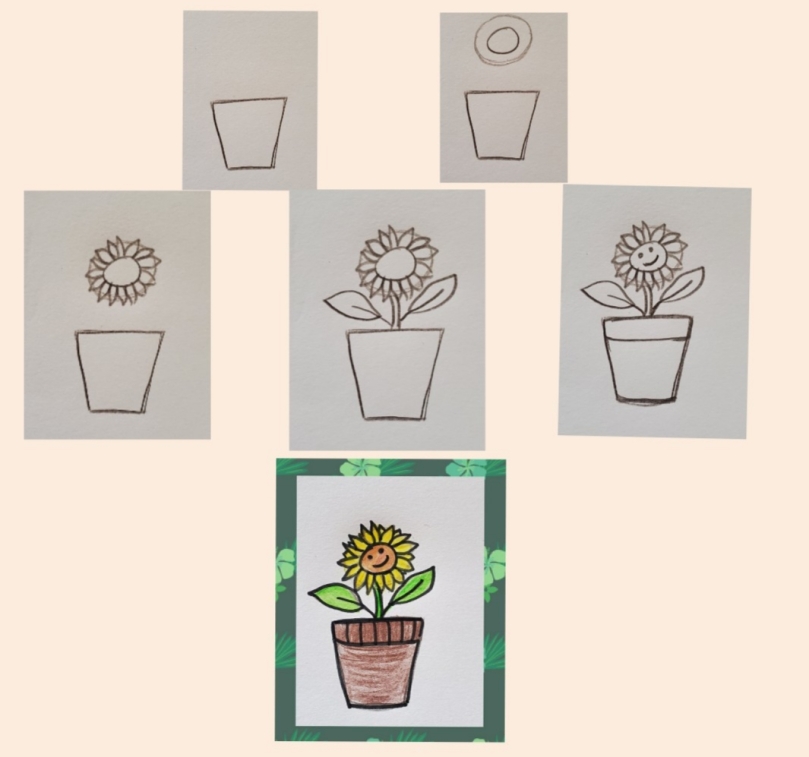
3. The sunflower hiding in the bushes.

4. The two houses- the ranch house( in orange) and the barn house in red).

I will be explaining how to draw each of the above things one by one.

Some of the other highlights on the painting are the far away vegetable gardens and the plantations on the hills.

1. The Tree

Following is the PDF file for instructions to draw a tree with Fall colors- medium oil

https://drive.google.com/open?id=0ByADP6gPQb_WOXV4OFZSVG5BUU0Fall tree

The pumpkin patch

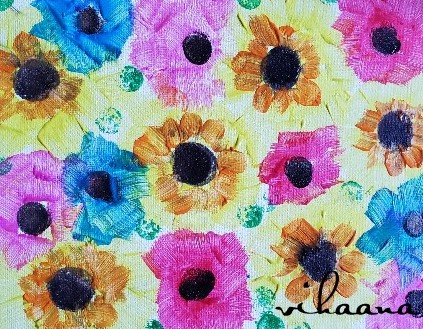
The flowers in the bushes

We don’t need to be too perfect in drawing the flower petals, just place some flowers randomly and cover them up with some tall grasses.

The Houses

Now that we have an idea of what all we have in our painting, we need to place them in their spots and there… we have our perfect painting for fall.

Fall tree and Pumpkin patch in oil pastel

Drawing Vehicles /transport

In the next few posts I will show step by step process to draw some transport/vehicles. The first 3 are cars from simple to advanced.

Cars-beginners to advanced

1 and 2 show basic car for beginners-toddlers


3 shows to draw a side view car


Aeroplane


Helicopter

Hot air balloon