Adding planes/ additional shapes to geometric shapes to create form: Lesson 1 in Form element of art

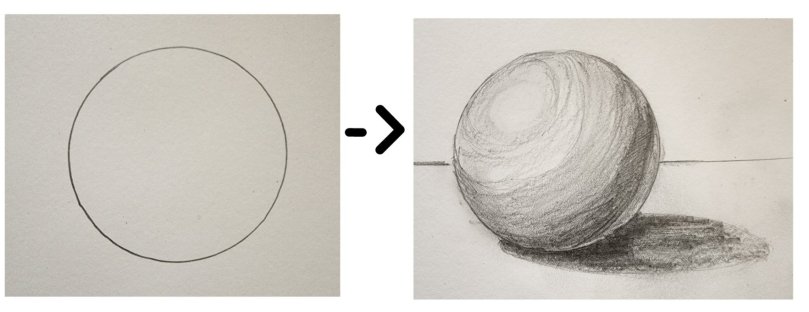
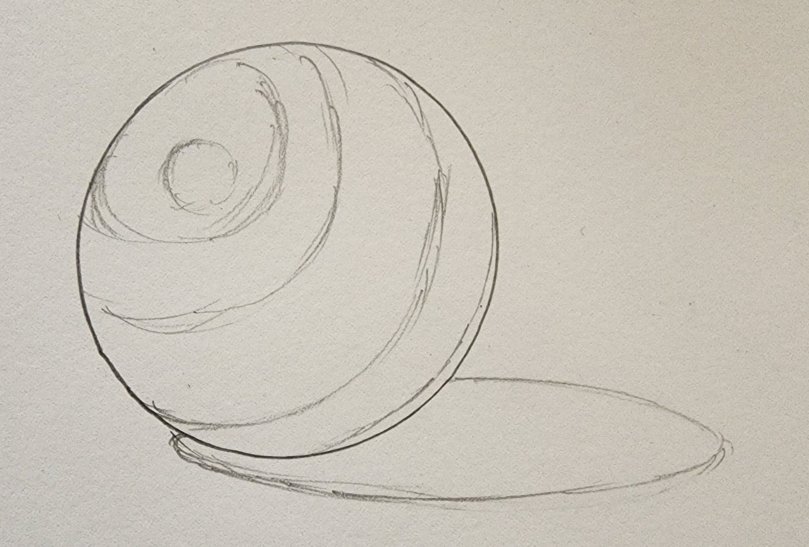
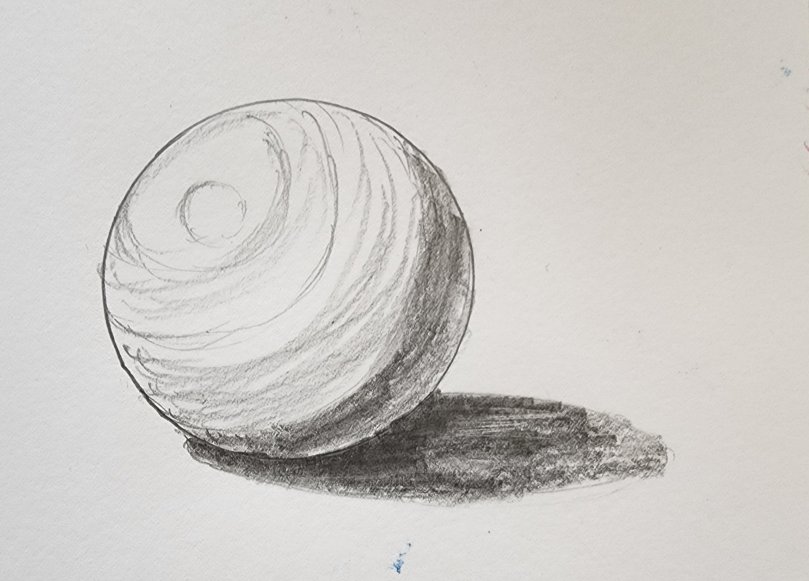
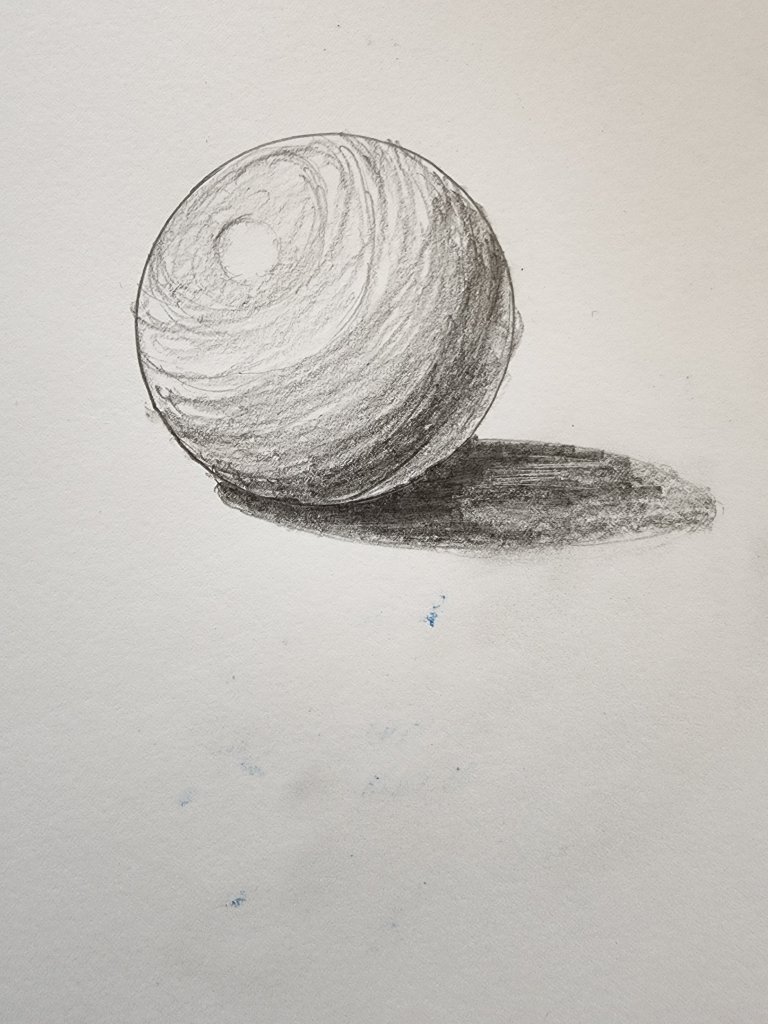
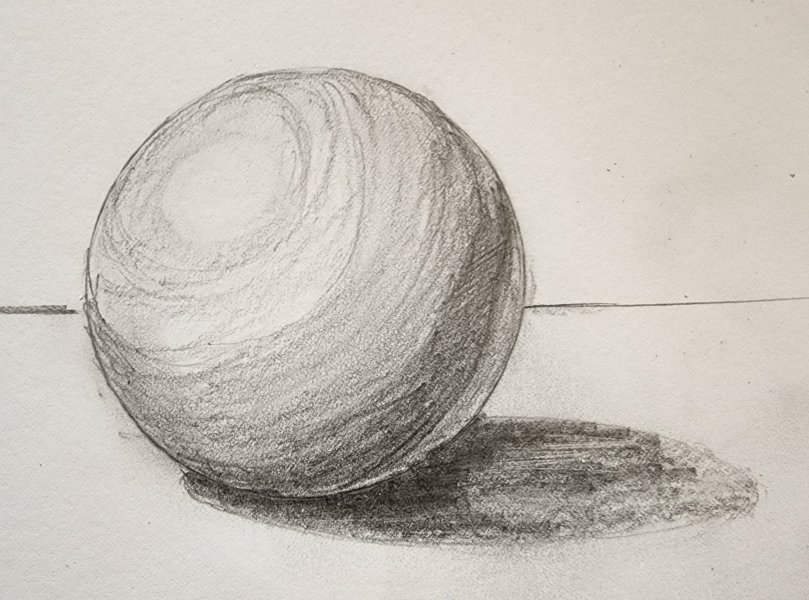
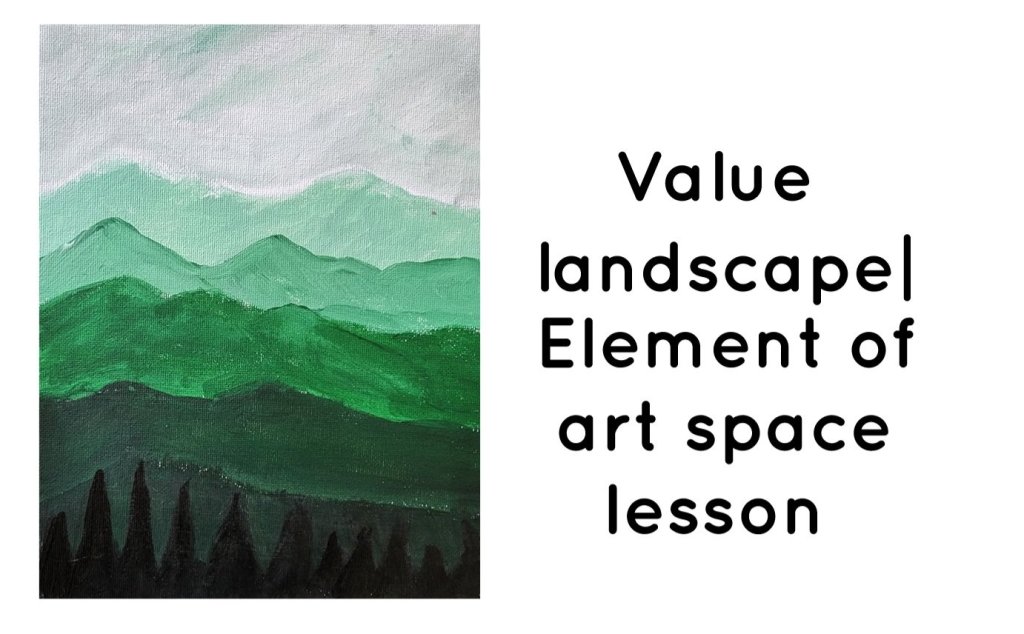
In our last lesson on space, we created an illusion of form using shading to define a sphere’s space.

In this lesson, we are going to see how different shapes are going to be combined to create a 3-dimensional form.

We will be working with the geometric shapes square, rectangle, oval, circle, and triangle and combining them to create a pyramid, cone, cube/cuboid, and cylinder.

In the next step, we will add shadows like we did in our previous exercise to define its space and give the shapes Form.

THINGS NEEDED:

It is a drawing exercise, so all you are going to need is a well-sharpened pencil, eraser, and drawing paper. You could use a ruler if you are not confident about your free-hand straight lines.

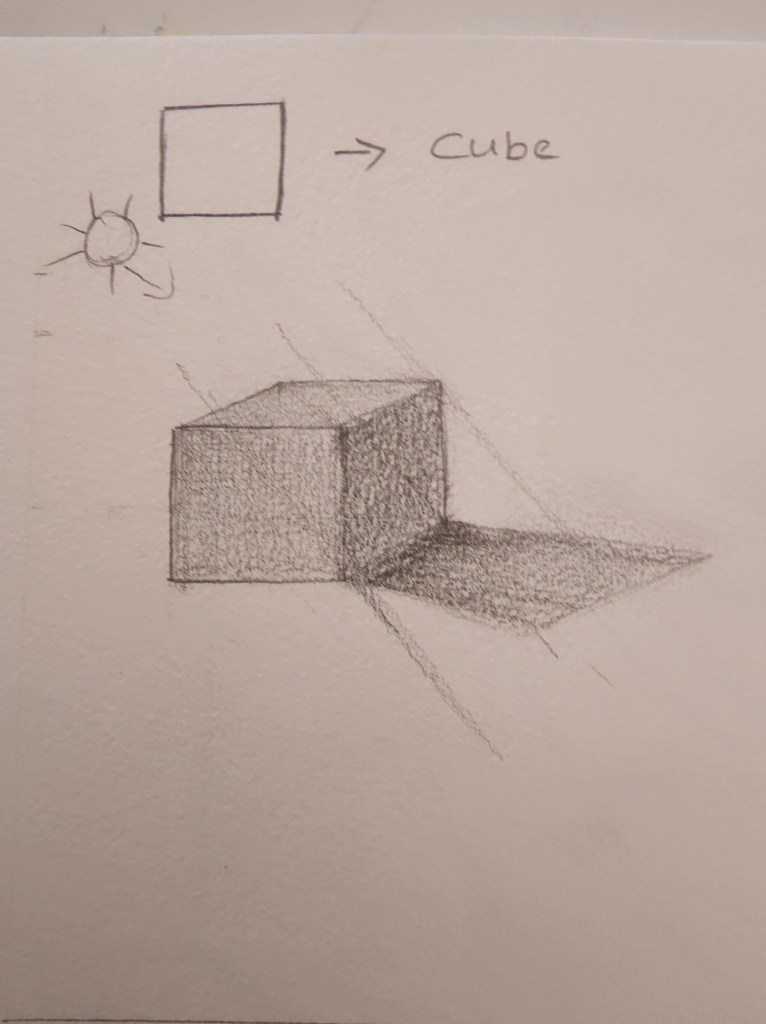
  • Creating a cube using squares– We start with a square and add two show 3 planes you create a cube form as shown in the drawing below. We also shade the 3 sides with different values and add a cast shadow below to define the space thus creating the illusion of a 3-dimensional object on a 2-dimensional paper.
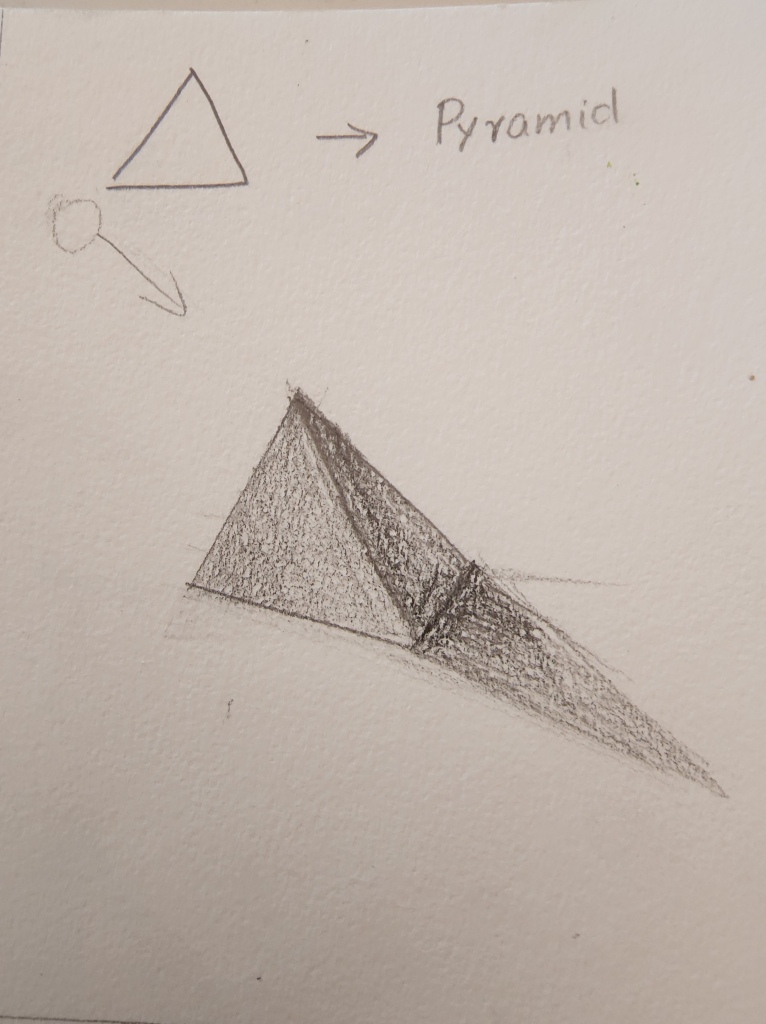
  • Creating a pyramid using triangles– We start with a triangle and add another triangle on the side as shown in the drawing below to create a pyramid. By shading the 2 sides with different values and adding a cast shadow we created a pyramid form and defined its space.
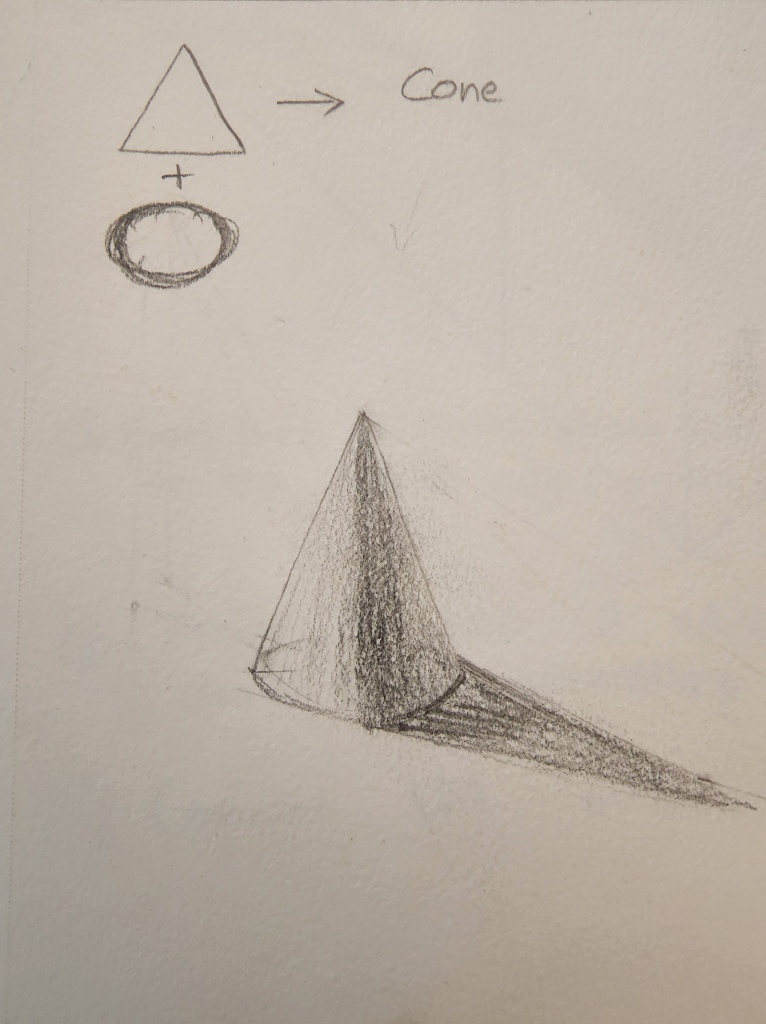
  • Creating a cone using triangle and circle– We start with a triangle and add a circle. We erase the baseline of the triangle and the backside of the circle to create the cone. Add value and shadow to create form and space. The figure is below for reference.

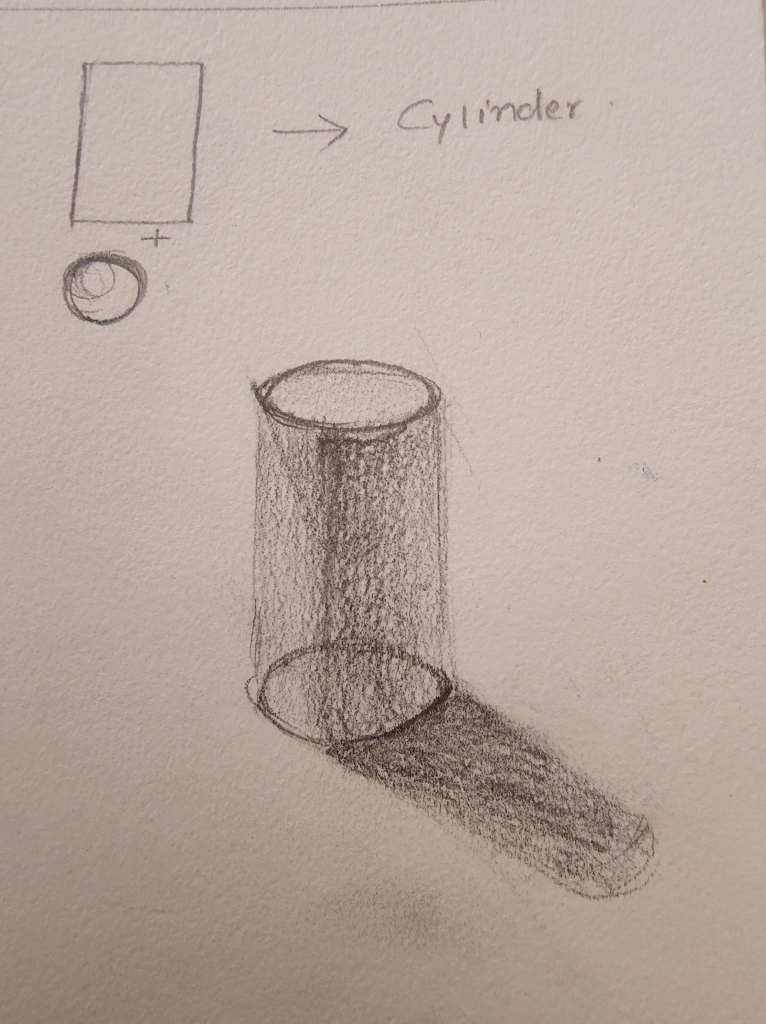
Creating a cylinder using rectangle and circle– We start with a rectangle and add two circles one on the top and another at the bootom. We erase the lines on the top and the bottom of the rectangle to create the cylinder. Add value and shadow to create form and space. The figure is below for reference.

Shading and reflections to create depth: Lesson 6 in Space Element of art

Adding shadows and reflections to objects is one of the ways to define the space where the subject of your art is placed. We are going to add shadows to turn a circle into a sphere.

Look at the slideshow below to see step-by-step how adding shadows can make a circle drawn on a flat piece of paper can make it look like a spherical object.

Next, let’s get to know the names of the different shadows that are on the space which define the circle as a sphere.

Highlights- The highlight is the lightest part of the object and it is actually a reflection of the light source.

Mid-tones- Midtones can be defined as the lighter areas of the shadow except for the highlight.

Core shadow- Core shadow is the darkest part of the shadow on the object.

Reflected Light- This is the shadow that is cast on the darkest part of the shadow by other objects around the subject of the drawing. It is lighter than the core shadow and darker than the mid-tones.

Cast Shadow- It is the shadow of the object on the opposite side of the light source and is usually cast on the ground or surface where the object is placed.

As you can see, adding the above shadows to a flat 2-Dimensional object transforms it and creates an illusion of a 3-dimensional form!

Using Value to create depth: Lesson 5 in Space Element of Art

When defining your space on a 2-dimensional drawing surface, it might be a challenge to create depth. We need to have a foreground, middle ground, and background to create a sense of depth and distance. One way to differentiate and define this space is by using different values and details.

Let us first try to understand some of the terms that we would be using in this lesson.

Value in art can be defined as the lightness or darkness of a color. In this lesson, we will create 7 values of a color. We will create 3 tints and 3 shades of a color Hue.

Hue- Hue is any color that you see on the basic color wheel. It means black and white are not hues whereas red, orange, yellow, green, blue, and purple are hues.

Tint- When we add white to any of the hues it creates a tint. Depending on the ratio of the colors that we mix we can create different tint.

Shade- When we add black to any of the hues it creates a shade. Depending on the amount of black that we mix with the hue we can create different shades of the same color.

Foreground is usually the main front of your picture. For defining this use a darker color, texture, and bigger size with a concentration on the details.

Background is the area that is the farthest from the viewer. Define this area with the lightest color, smaller in size, and fewer details

Middle ground is the area between the foreground and background!!

In this art project, we will paint a mountain landscape with trees that has a foreground, middle ground, and background.

Things needed:

1. Mixed media drawing paper

2. Acrylic paint- black, white, and a color of your choice and brushes

Step-by-step instructions:

1. The first step is to create a simple landscape with 5 or more layers of mountains and some trees in the foreground( the bottom of the page.

2. The next step is to create a range of colors from light to dark. For my project, I decided to create different values of green color.

3. Creating tinted colors- I am going to create three tinted values of green by mixing my green color with different amounts of white.

4. Next I am also going to create 3 shade colors of green by adding black to them.

5. Then I am going to apply my colors to my drawing.

The mountains in the background are going to be the lightest and I am going to paint them with my tinted colors.

The middle ground will have a medium value and I am going to paint it green from my paint tube.

For the foreground, I will use the darkest colors and use my 2 shades to do the mountains and the darkest one to paint my trees.

To watch this lesson on video follow along with the video :

Positive and Negative space- Lesson 4 in Space Element of Art

Space is the area around and within the subject of your art or you could say that it is the picture plane where your art is created. It can be said that it is a technique that creates an illusion of depth and volume on a flat surface of the paper.

We can classify space into two components: Positive space and Negative space.

Positive space is the main idea or subject of the artwork to which your eye is drawn whereas Negative space is the area around it.

In this exercise, we will learn about positive and negative space with an artwork where we will draw our hands as a positive and negative space.

The positive space will have details with line art using black permanent marker!!

Please follow along on Youtube to watch this lesson in video format or continue reading

Things needed:

  1. Two White mixed media paper
  2. One Black paper
  3. White colored pencil
  4. Black permanent marker
  5. glue and scissors

Steps to follow:

  1. Using your white colored pencil draw an outline of your hands on the black paper.
  2. Then create a neat cut out, so that you have a black hand shaped cutout and the paper around it creating a hand shaped hole.
  3. Stick each of these on the two white drawing paper.
  4. The black area is your negative space.
  5. So now you have one artwork with your hand as the positive space and another one with your hand as the negative space.
  6. I designed the positive area with some line art, but you can choose to do something else too!
Step 1 : outline of hand
Step 2& Step 3: Creating cutout and stick it on white paper
Step 2 and Step 3: Creating cutout and stick it on white paper
Step 5 and Step 6: Adding a line art to your positive spaces( white area)