Oil Pastels for Little Artists

Oil Pastel is an art medium that has been probably introduced to every kid in an elementary school art lesson. It is softer and better than regular crayons as they have brighter colors when applied properly and because of the wax or oil in them they spread much easily than a regular crayon where you have to press really hard to make sure that all your white spaces are colored.

But because of the oil texture, it can become messy if not handled properly. In this post I will show how to handle Oil pastels properly if you are an absolute beginner.

Some basic tips to help you get started

  1. Keep a paper towel or rag towel handy with you so that you can clean your hands often. You do not want the paint from your hands transferring on to your drawing paper.
  2. Every time you blend two or more colors on a surface, make sure that you use a paper towel to clean the oil pastel stick after use.
  3. You can use a blending stump or stick, a paper tissue, a Q-tip or even your clean fingers to blend and smoothen colors. ( Side Note: Professional ones do blend better and have a creamier texture than student Oil Pastels, but I would not recommend a professional quality oil pastel for beginners or kids; Student quality ones are really affordable whereas professional ones are really expensive)
  4. Choose your colors wisely while blending colors together, otherwise you will end up with a muddy mess. You can even try out on a scrap paper before applying it to your actual artwork.
  5. Always layer or blend with at least two to three colors when using oil pastels, but while choosing the colors for blending avoid colors that are on opposite side of the color wheel.
  6. Do not keep touching your art while you are working. You may cover up the areas that have been colored using a paper while working on the other areas. This will prevent the paint from transferring to your hands and to the other parts of your artwork and making it messy.
  7. Always cover your artwork with a newspaper while storing. You may also get a Fixative spray to spray on your finished artwork to prevent it from smudging.
  8. Oil Pastel artworks need to breathe, so do not frame them in glass frame with no room for air.
  9. You need to use a thick paper for applying the thick layers of oil Pastel colors. Though I usually use mixed media paper for doing my artwork, you also find Oil Pastel Paper pads that come in different shades rather than just plain white paper.

Few Beginner techniques to get you started

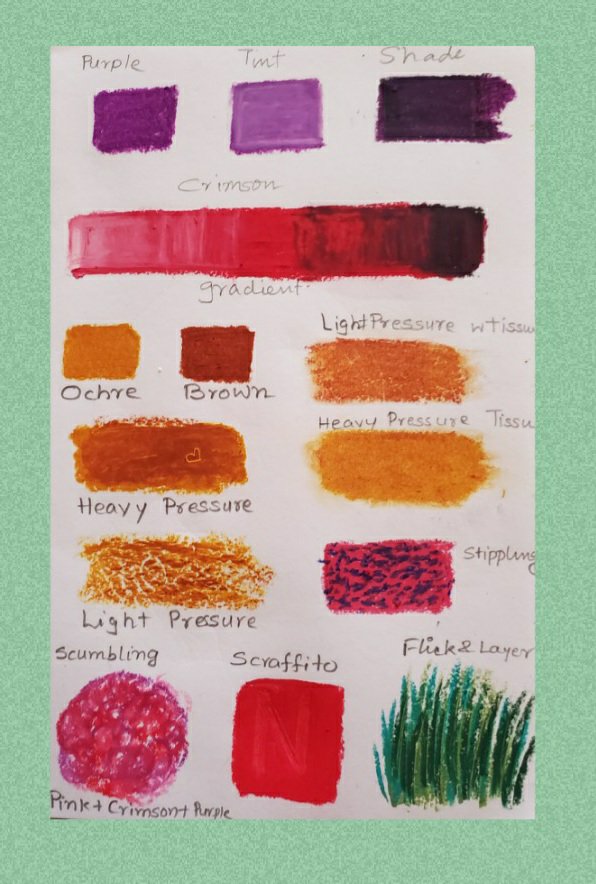
1.Tint. Adding White to a color to make it lighter. Start with any color and then blend it with white to make it lighter.

2. Shade. Adding Black to a color to make it darker. I usually start with black( apply the black very lightly ) and on top just apply the color of your choice and blend it together.

3. Tint +Shade. Gradation from lighter shade to the darker shade. Start with a tint and then move on to the base color and then add the shade. Lighter to darker.

4. Light Pressure blend. Blend or mix 2 or more colors with a light pressure using your fingers, paper tissue or a blending stump

5.Heavy Pressure blend. Blend or mix 2 or more colors by applying heavy pressure using fingers, tissue or blending stump

6.Stippling. Start with a lighter base and then layering it with a group of dots using a darker color

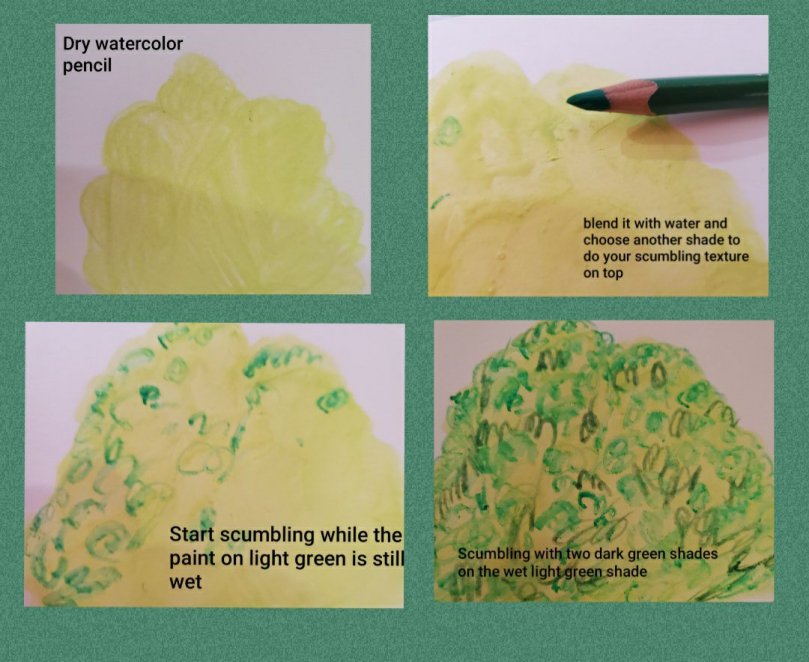
7. Scumbling. Scribbling in circular motions with multiple colors to make a texture

8. Scraffito. Starting with a color (light or dark) and then scratching it with something to make texture or design.

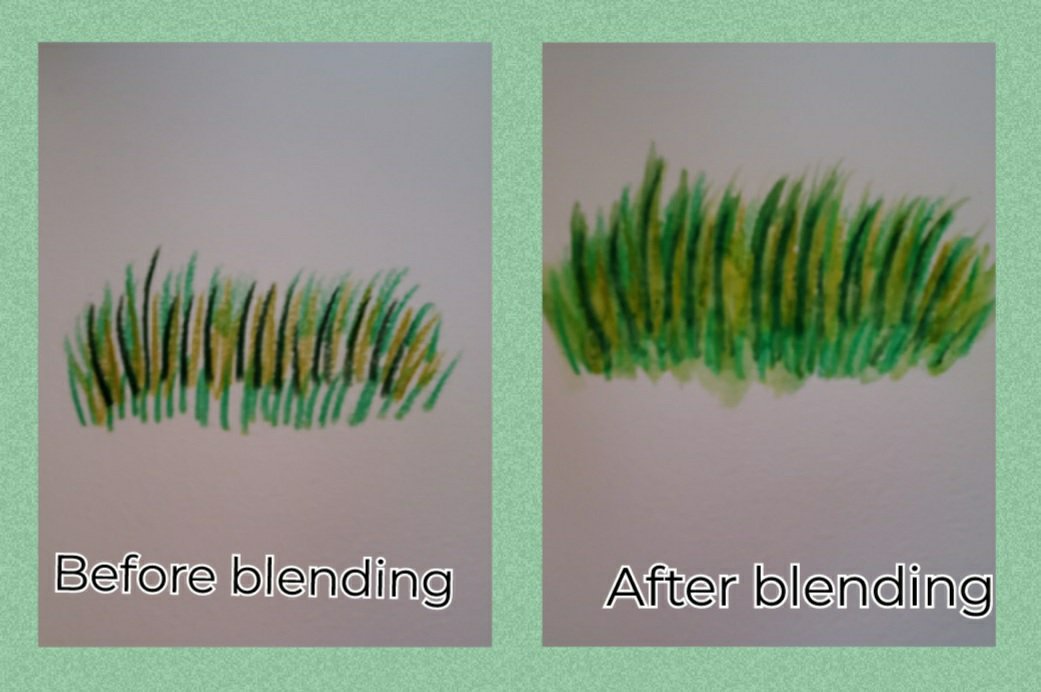
9.Flicking-Dark on light. Start with a lighter base and draw lines on top using 1 or more darker shades with flicking motion

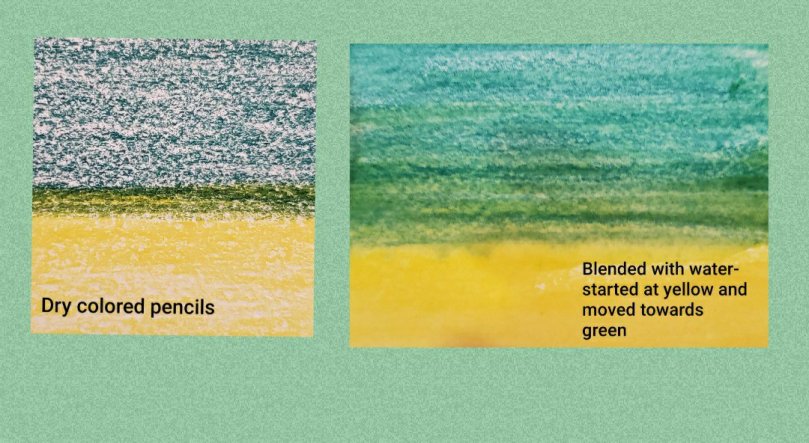
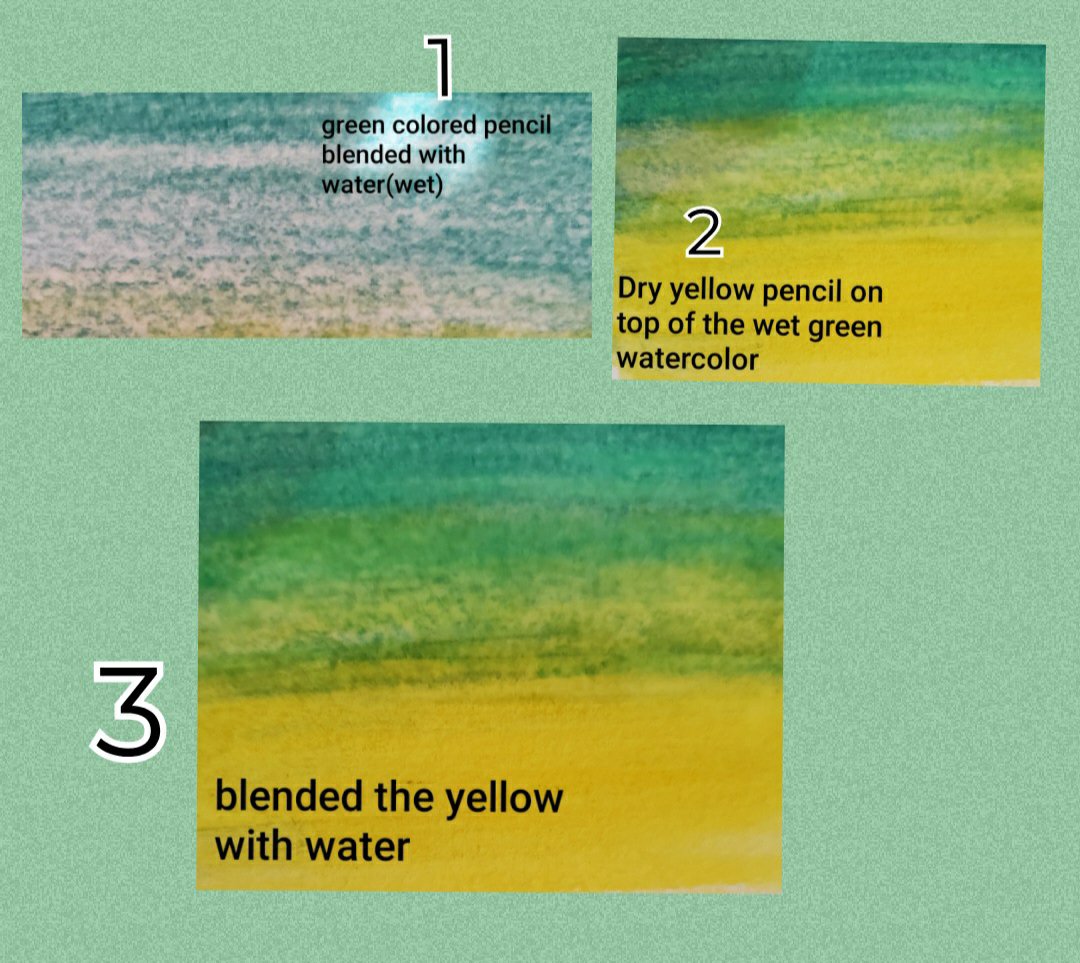
10. Blending using solvent. Using a baby oil or mineral spirit to blend the colors

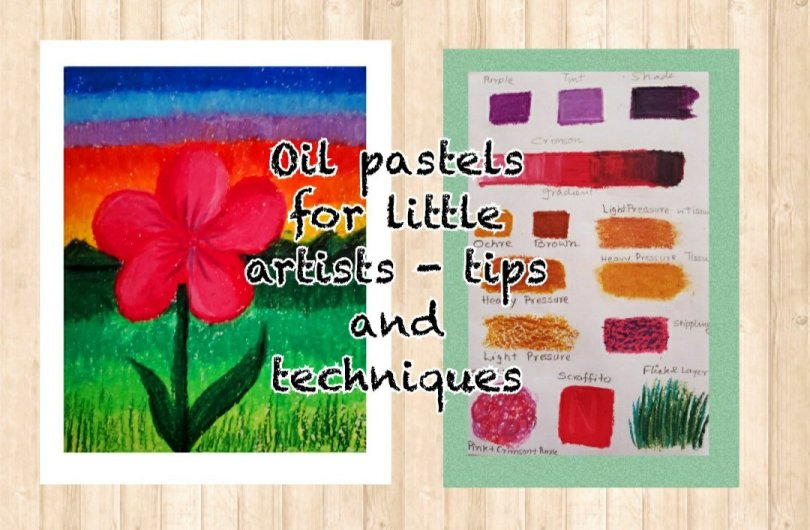
Keeping in mind all the above tips, try out this simple flower at Sunset using oil Pastels

Watercolor Pencils for Little artists!

What are Watercolor pencils?

Watercolor Pencils look very similar to regular colored pencils, but you can activate it by adding water to create a soft blended look. They can be used very well to create your base drawing for a watercolor painting and also to add finer details or to do your whole painting!

Advantages

  • Watercolors can be difficult to handle, especially for children because most of the time they end up adding too less water or too much water. Watercolor pencils on the other hand can be easier to control. You may draw your artwork with your watercolor pencils like you would do with a regular colored pencils( applying lighter and darker shades, layering with different colors ) and then when you are satisfied add a bit of water at a time to blend it in.
  • The second advantage is to be able to sketch your idea especially if you are planning on painting something with a lot of details.
  • You can also use it to add finer details to your finished painting with much ease.
  • The next advantage is that it is easier to maintain. You don’t have the hassle to clean your brushes every time. You don’t have to invest in expensive brushes. I usually use a size 6 or 8 round brush. But what I really like is watercolor brush pens. I just fill it in with water and I am good to go!

That being said, is watercolor pencils a replacement to traditional watercolors? The answer is : NO! But still it a good way to begin and get used to the idea of watercolors for young artists.

Watercolor pencil Techniques

I am going to try some basic beginner techniques using watercolor pencils, some of them are very similar to what we would use for regular watercolors!

  • Creating Washes

We will do four different kind of washes: The colors I used are Orange-Red and a bright Yellow from my Arteza Watercolor Pencil set

  1. Flat wash – To create a flat wash I used my Orange-Red and colored it evenly with medium pressure through out; next I used my round brush and some water to blend it in to create an even shade of orange.
  2. Gradient wash- To create my gradient wash I used my Orange-red and started coloring with heavy pressure and gradually decreased my pressure as I went down so that I have a gradient value of lighter to darker. Then I started blending from the lighter part to darker part to create my gradient wash of orange.
  3. Layered wash ( light on dark)- To create this wash I started by coloring with my orange -red( darker shade) and then layered it on top with my lighter shade( yellow); then I blended it with water. This created an Orange-yellow shade with Orange as my dominant color.
  4. Layered wash ( dark on light)- To create this wash I started with my yellow( lighter shade) with heavy pressure and then layered it on top with my Orange-red (darker shade) with medium to light pressure; then I blended it with water. This created a yellow-orange shade with yellow as my dominant color.
  • Dry-on-Wet and Wet-On-Wet Techniques
  1. Dry-on-wet: In this technique, we will first wet our watercolor paper with water, then go on top with our dry watercolor pencil.
  2. Wet-on-wet: In this technique, we will first wet our watercolor paper, then wet the tip of our pencil too and ten use the wet pencil on our wet paper.

These seem to work very similar to usual watercolors but, the color pigments are visible clearly unlike regular watercolors.

  • Variegated wash In this technique, you use multiple colors blending them in when one color meets the other. There are two ways to try this using watercolored pencils: 1. Adding the first color, blending it with water and while it is still wet, start at the bottom with your 2nd colored pencil! (Dry on Wet)

2. Add the first color, then add the second color at the bottom mixing it where they meet and then blend the colors using water.

  • Scumbling In this technique, you make random patterns with single or multiple colors to add interesting texture. I am going to apply my first layer and blend it first. Then on top I am going to add my random scumbling texture with my dry colored pencil.
  • Flicking In this technique, you make lines by starting off with heavy pressure and flick up so that the pressure decreases at the end of the line, thus creating lines which are thicker at the bottom and get thinner as you go up. This is a great technique to create grass texture and much easier to do with watercolored pencils rather than using traditional watercolors.